User guide
Rich text and merge tags
Outcome: formatted text with links and personalised merge tags, written straight on the canvas.
Edit text in place
Click a heading or paragraph to select it, then click into the text (or double-click) to start typing. A formatting bar appears above the text:
Bold, italic, underline, strikethrough, bulleted list, numbered list, align left, centre or right, link, and { } for merge tags.
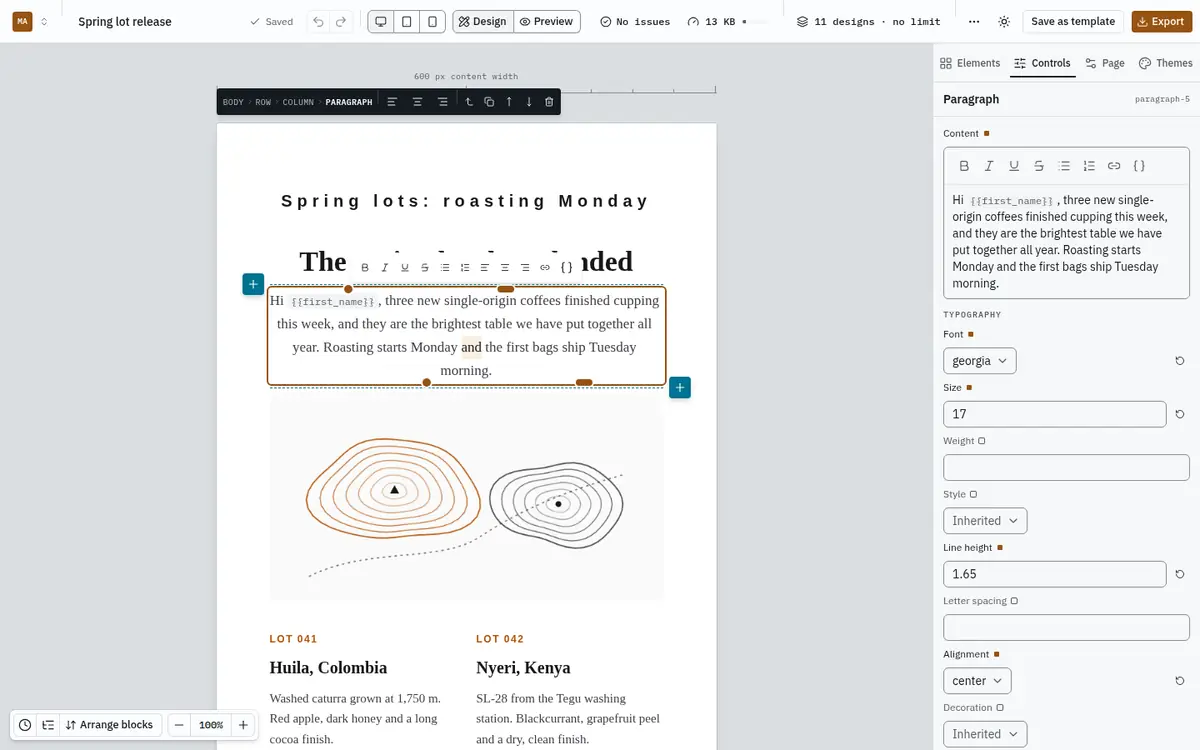
The same editor is also in the Content field of the Controls tab, if you prefer to type there.
Keyboard shortcuts work as you expect: Ctrl/⌘+B, I and U.
Add a link
Select the words, click the link button, type the address and click Apply. Addresses must start with https://, http://, mailto: or tel:; anything else is refused, because email clients and spam filters treat odd links as a warning sign.
Pasting from Word or Google Docs
Paste as usual. Headings, bold, italic, lists and links are kept; fonts, colours and anything an email cannot show reliably are dropped, so the text takes the design's own style.
Insert a merge tag
A merge tag is a placeholder such as {{first_name}} that your sending service replaces with each recipient's details when it sends. Mailnib keeps it exactly as written in every export.
- Put the cursor where the tag should go.
- Click { } in the formatting bar.
- Search or scroll, and choose a tag.
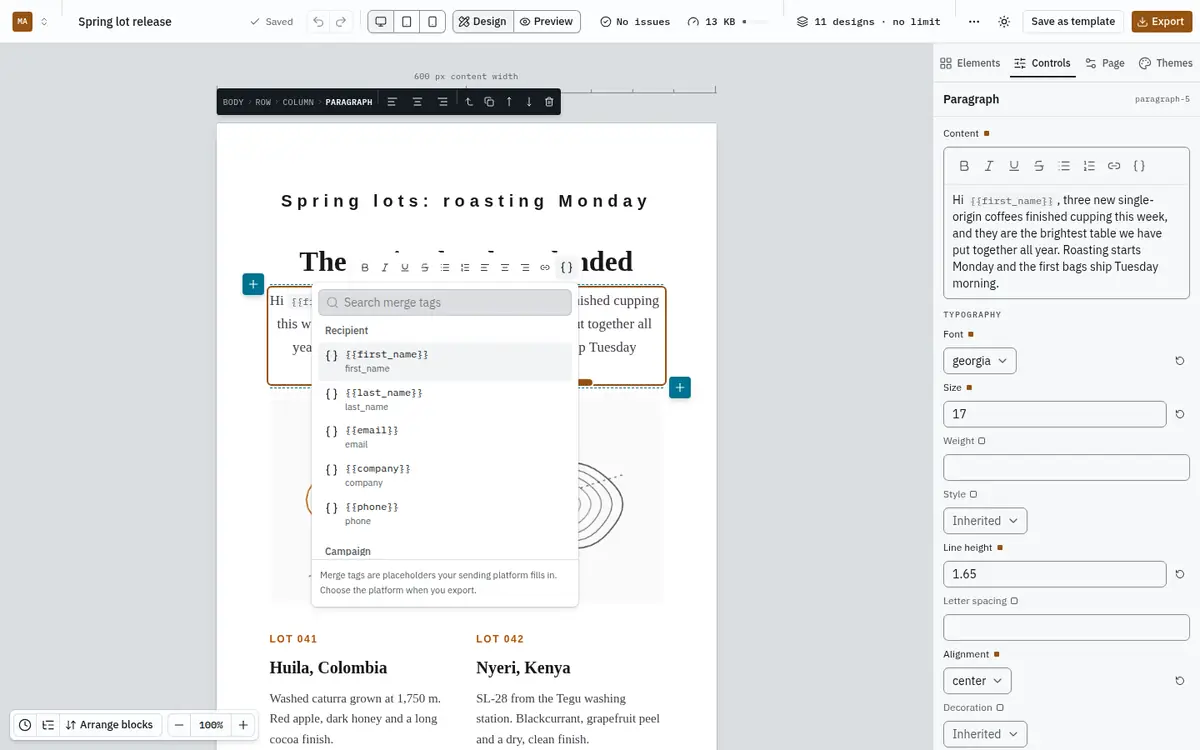
The tag appears as a chip. It moves and deletes as one piece, so it cannot be broken by a stray keystroke. Tags are grouped into Recipient, Campaign, System and Workspace. Which tags are listed is set by your platform operator; if a tag your sending service needs is missing, ask them to add it.
A tag can carry a fallback for recipients without that detail, written {{first_name|there}}, which reads "Hi there" when the first name is empty.
Check the tags
The email checks warn you if a design uses:
- a tag that is not in the catalog, or
- a tag written with capital letters, which most sending services would not fill in.
They also warn when an email has no unsubscribe link. Add one to the footer with the {{unsubscribe_url}} tag.