User guide
Brand kit and themes
Outcome: every new design already looks like your brand, and any existing design can switch to it in one click.
The brand kit
Open Brand kit in the sidebar of your workspace. A workspace has no brand kit until someone creates one: the page starts with Create brand kit, and until you save, the editor's Themes tab offers only Default and the built-in themes. Set these once:
- Logo, uploaded here or chosen from your media. It appears at the top of every template that has a masthead.
- Palette: six colours, each feeding one default in the editor: Ink (headings), Accent (links), Body text, Panels, Rules and dividers, and Page background.
- Fonts for headings and body, chosen from the email-safe stacks the product ships with. Email clients only show fonts the reader's device has, so each choice carries a fallback such as Georgia or Arial.
- Sender and footer: legal name, postal address, from name and address, reply-to, website and a footer note. Most countries require a postal address in marketing email; it fills the
{{company_address}}merge tag. - Social links, in the order the Social block will show them.
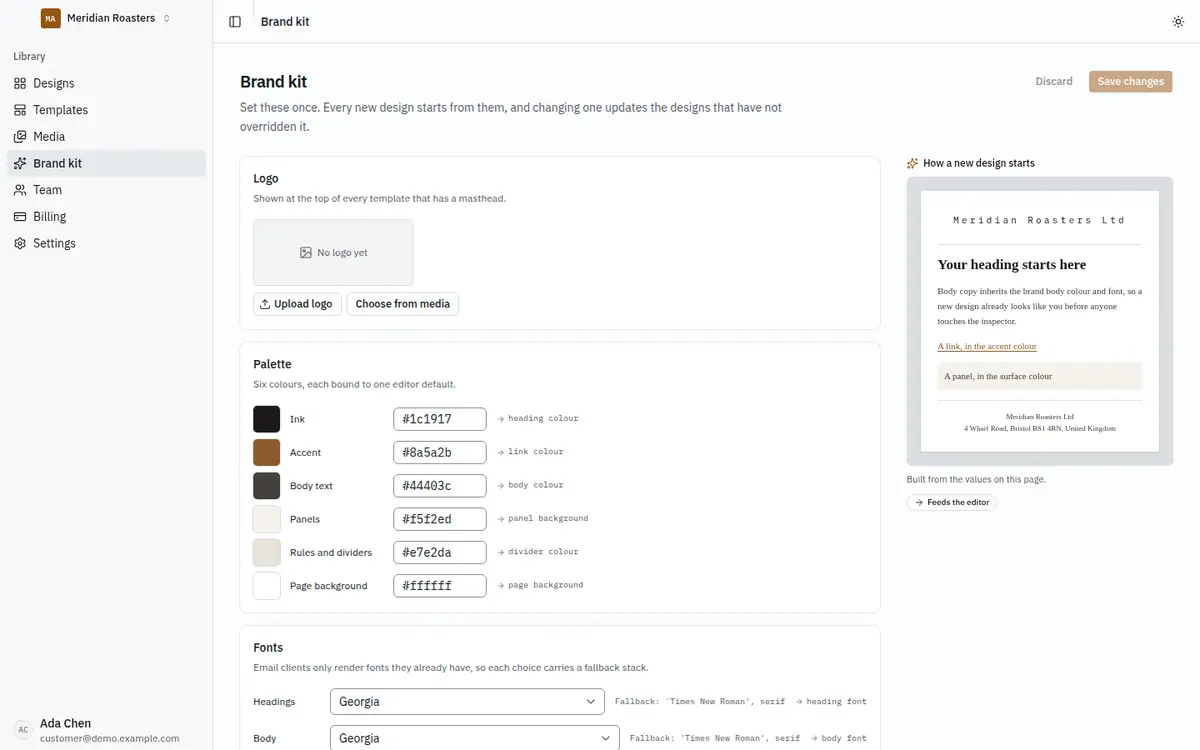
The preview on the right shows how a new design will start. Click Save brand kit (or Save changes, once it exists) when you are done. Discard puts the page back to what is saved.
Changing the brand kit later updates every design that still uses its values. Anything a design has changed by hand keeps its own value.
Owners and admins can edit the brand kit; editors and viewers cannot.
Themes
A theme restyles a whole design, its colours and type, without touching its content. Open a design, then the Themes tab of the inspector.
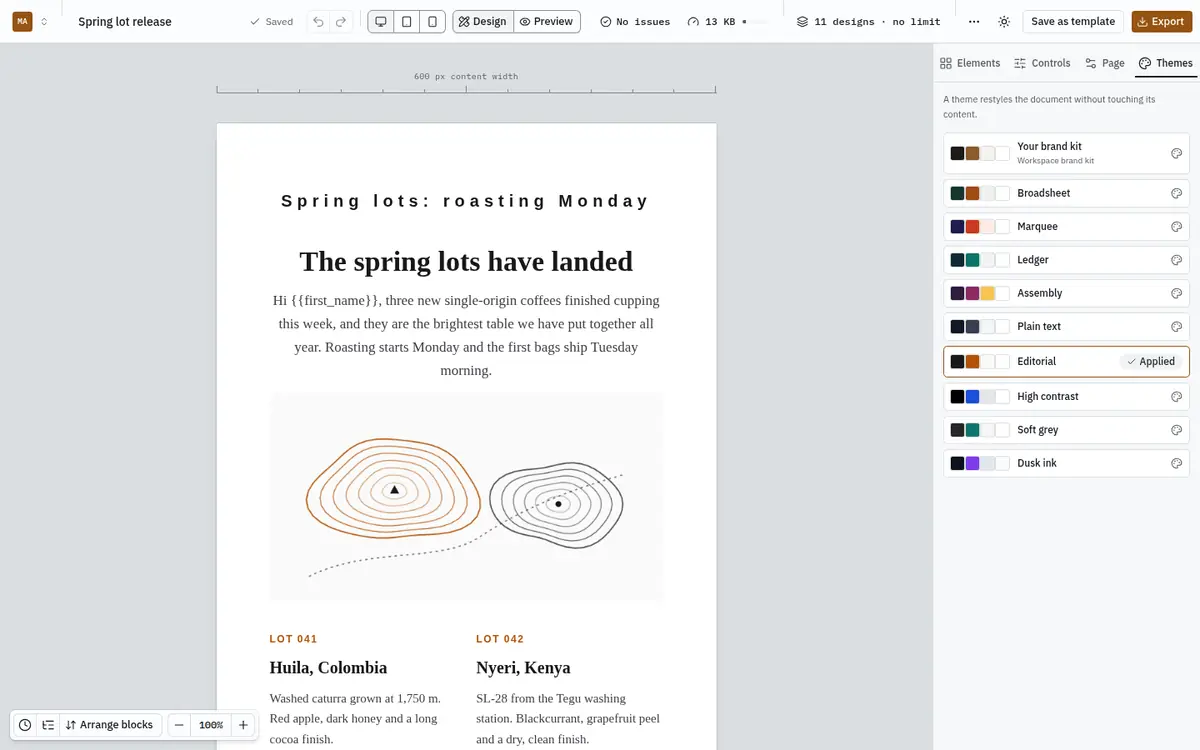
- Your brand kit applies your workspace's colours and fonts. It is listed only once your workspace has saved a brand kit; before that the first entry is Default.
- The built-in themes (Broadsheet, Marquee, Ledger, Assembly, Plain text, Editorial, High contrast, Soft grey, Dusk ink) are starting points you can use as they are.
Click a theme to apply it. The current one is marked Applied. Blocks where you changed a colour or font by hand keep your change; use the reset arrow next to a setting in Controls to hand it back to the theme.
Why some changes do not follow the theme
In Controls, a small filled square next to a setting means the block overrides the theme. That is deliberate: a red "Sale" button stays red when you switch theme. Reset the setting to let the theme decide again.
First workspace setup
After registration, onboarding saves your workspace name and default sender address, then offers optional logo, palette and typeface choices. The logo uses the same validated media upload as the brand-kit screen and can be removed. Continue saves each step; Skip for now saves your entries and leaves that step unfinished. Return to /onboarding to resume.
The last step uses the real template catalogue. Templates above your plan remain visible with a lock and an upgrade option. A template chosen before registration is preselected, and Blank is always available. Open the editor creates your first design after checking your plan limit. Setup creates no design before that confirmation. Free includes one default brand kit.